


Como criar gradientes animados em Qt/QML ✨
Por conta da escassez de conteúdo avançado disponível sobre alguns tópicos em QML, criar componentes modernos pode ser muuuuuuito desafiador. Nesse tutorial vou te ensinar a criar um gradiente animado utilizando Qt 6.5, sem enrolação. Vou usar o botão de exemplo, já que foi uma task real que precisei fazer, mas pode ser aplicado à qualquer componente, já que esse código vai ser bem fácil de abstrair. 1. Criando o botao import QtQuick import QtQuick.Window import QtQuick.Controls.Basic Window { width: 640 height: 480 visible: true Button { id: animatedButton height: 44 width: 156 anchors.centerIn: parent contentItem: Text { text: "Button" font { bold: true pixelSize: 16 } color: "#EBECED" verticalAlignment: Text.AlignVCenter horizontalAlignment: Text.AlignHCenter } background: Rectangle { id: backgroundRectangle anchors.fill: parent color: "black" } HoverHandler { cursorShape: Qt.PointingHandCursor } } } Output: 2. Adicionando o gradiente ao background Aqui vamos definir 3 propriedades para utilizar no GradientStop, que é o responsável por aplicar a cor no ponto definido pela propriedade position Button { id: animatedButton property color firstColor: "#A10A0B" property color secondColor: "#C8191E" property color thirdColor: "#FF2F3A" height: 44 width: 156 anchors.centerIn: parent contentItem: Text { text: "Button" font { bold: true pixelSize: 16 } color: "#EBECED" verticalAlignment: Text.AlignVCenter horizontalAlignment: Text.AlignHCenter } background: Rectangle { id: backgroundRectangle anchors.fill: parent gradient: Gradient { orientation: Gradient.Horizontal // Aqui você pode escolher qual será a orientação do Gradiente (O default é Vertical) GradientStop { position: 0 color: animatedButton.firstColor } GradientStop { position: 0.5 color: animatedButton.secondColor } GradientStop { position: 0.7 color: animatedButton.secondColor } GradientStop { position: 1 color: animatedButton.thirdColor } } radius: 4 } Output: ˖°✧ aqui já ficou lindo, né? ✧˖° 3. Criando e executando a animação Eu optei por utilizar o SequentialAnimation pois ele me permite executar multiplas animações uma após a outra, dando o efeito de movimento que eu precisava pra essa task. E o ColorAnimation é quem vai cuidar da troca de uma cor pra outra (Da cor definida no meu gradiente inicial, para uma cor nova que eu vou definir) SequentialAnimation { id: gradientAnimation ColorAnimation { from: "#FF2F3A" to: "#A10A0B" duration: 450 targets: animatedButton properties: "firstColor" } ColorAnimation { from: "#FF2F3A" to: "#A10A0B" duration: 450 targets: animatedButton properties: "secondColor" } ColorAnimation { from: "#FF2F3A" to: "#A10A0B" duration: 450 targets: animatedButton properties: "thirdColor" } // Aqui você vai definir o número de vezes que essa animação deve ser executada // Caso queira que ela execute sem parar, você vai usar o Animation.Infinite loops: Animation.Infinite } Por último, você vai escolher quando essa animação será executada utilizando a função restart() Eu optei por executá-la quando o componente é criado, então adicionei ao onCompleted, chamando a função pelo id da animação: Component.onCompleted: gradientAnimation.restart() E Assim ficou o Código completo com a animação executando: import QtQuick import QtQuick.Window import QtQuick.Controls.Basic import QtQuick.Layouts Window { width: 640 height: 480 visible: true Component.onCompleted: gradientAnimation.restart() Button { id: animatedButton property color firstColor: "#A10A0B" property color secondColor: "#C8191E" property color thirdColor: "#FF2F3A" height: 44 width: 156 anchors.centerIn: parent contentItem: Text { text:
Por conta da escassez de conteúdo avançado disponível sobre alguns tópicos em QML, criar componentes modernos pode ser muuuuuuito desafiador. Nesse tutorial vou te ensinar a criar um gradiente animado utilizando Qt 6.5, sem enrolação.
Vou usar o botão de exemplo, já que foi uma task real que precisei fazer, mas pode ser aplicado à qualquer componente, já que esse código vai ser bem fácil de abstrair.
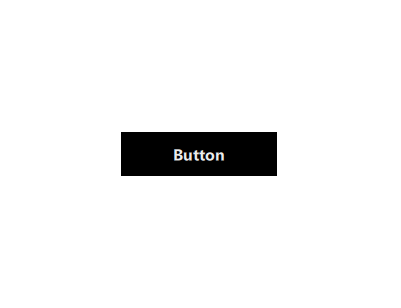
1. Criando o botao
import QtQuick
import QtQuick.Window
import QtQuick.Controls.Basic

Window {
    width: 640
    height: 480
    visible: true

    Button {
        id: animatedButton
        height: 44
        width: 156
        anchors.centerIn: parent

        contentItem: Text {
            text: "Button"
            font {
                bold: true
                pixelSize: 16
            }
            color: "#EBECED"
            verticalAlignment: Text.AlignVCenter
            horizontalAlignment: Text.AlignHCenter
        }

        background: Rectangle {
            id: backgroundRectangle
            anchors.fill: parent
            color: "black"
        }

        HoverHandler {
            cursorShape: Qt.PointingHandCursor
        }
    }
}
Output:
2. Adicionando o gradiente ao background
Aqui vamos definir 3 propriedades para utilizar no GradientStop, que é o responsável por aplicar a cor no ponto definido pela propriedade position
Button {
        id: animatedButton
        property color firstColor: "#A10A0B"
        property color secondColor: "#C8191E"
        property color thirdColor: "#FF2F3A"
        height: 44
        width: 156
        anchors.centerIn: parent

        contentItem: Text {
            text: "Button"
            font {
                bold: true
                pixelSize: 16
            }
            color: "#EBECED"
            verticalAlignment: Text.AlignVCenter
            horizontalAlignment: Text.AlignHCenter
        }

        background: Rectangle {
            id: backgroundRectangle
            anchors.fill: parent
            gradient: Gradient {
                orientation: Gradient.Horizontal // Aqui você pode escolher qual será a orientação do Gradiente (O default é Vertical)
                GradientStop {
                    position: 0
                    color: animatedButton.firstColor
                }
                GradientStop {
                    position: 0.5
                    color: animatedButton.secondColor
                }
                GradientStop {
                    position: 0.7
                    color: animatedButton.secondColor
                }
                GradientStop {
                    position: 1
                    color: animatedButton.thirdColor
                }
            }
            radius: 4
        }
Output:
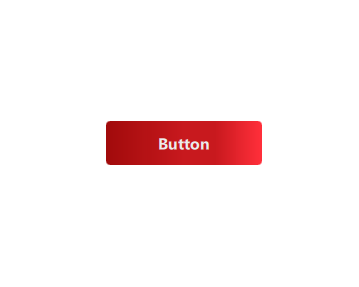
˖°✧ aqui já ficou lindo, né? ✧˖°
3. Criando e executando a animação
Eu optei por utilizar o SequentialAnimation pois ele me permite executar multiplas animações uma após a outra, dando o efeito de movimento que eu precisava pra essa task.
E o ColorAnimation é quem vai cuidar da troca de uma cor pra outra (Da cor definida no meu gradiente inicial, para uma cor nova que eu vou definir)
SequentialAnimation {
            id: gradientAnimation
            ColorAnimation {
                from: "#FF2F3A"
                to: "#A10A0B"
                duration: 450
                targets: animatedButton
                properties: "firstColor"
            }
            ColorAnimation {
                from: "#FF2F3A"
                to: "#A10A0B"
                duration: 450
                targets: animatedButton
                properties: "secondColor"
            }
            ColorAnimation {
                from: "#FF2F3A"
                to: "#A10A0B"
                duration: 450
                targets: animatedButton
                properties: "thirdColor"
            }

            // Aqui você vai definir o número de vezes que essa animação deve ser executada
            // Caso queira que ela execute sem parar, você vai usar o Animation.Infinite
            loops: Animation.Infinite
}
Por último, você vai escolher quando essa animação será executada utilizando a função restart()
Eu optei por executá-la quando o componente é criado, então adicionei ao onCompleted, chamando a função pelo id da animação:
Component.onCompleted: gradientAnimation.restart()
E Assim ficou o Código completo com a animação executando:
import QtQuick
import QtQuick.Window
import QtQuick.Controls.Basic
import QtQuick.Layouts

Window {
    width: 640
    height: 480
    visible: true

    Component.onCompleted: gradientAnimation.restart()

    Button {
        id: animatedButton
        property color firstColor: "#A10A0B"
        property color secondColor: "#C8191E"
        property color thirdColor: "#FF2F3A"
        height: 44
        width: 156
        anchors.centerIn: parent

        contentItem: Text {
            text: "Button"
            font {
                bold: true
                pixelSize: 16
            }
            color: "#EBECED"
            verticalAlignment: Text.AlignVCenter
            horizontalAlignment: Text.AlignHCenter
        }

        background: Rectangle {
            id: backgroundRectangle
            anchors.fill: parent
            gradient: Gradient {
                orientation: Gradient.Horizontal
                GradientStop {
                    position: 0
                    color: animatedButton.firstColor
                }
                GradientStop {
                    position: 0.5
                    color: animatedButton.secondColor
                }
                GradientStop {
                    position: 0.7
                    color: animatedButton.secondColor
                }
                GradientStop {
                    position: 1
                    color: animatedButton.thirdColor
                }
            }
            radius: 4
        }
        SequentialAnimation {
            id: gradientAnimation
            ColorAnimation {
                from: "#FF2F3A"
                to: "#A10A0B"
                duration: 450
                targets: animatedButton
                properties: "firstColor"
            }
            ColorAnimation {
                from: "#FF2F3A"
                to: "#A10A0B"
                duration: 450
                targets: animatedButton
                properties: "secondColor"
            }
            ColorAnimation {
                from: "#FF2F3A"
                to: "#A10A0B"
                duration: 450
                targets: animatedButton
                properties: "thirdColor"
            }

            loops: Animation.Infinite
        }

        HoverHandler {
            cursorShape: Qt.PointingHandCursor
        }
    }
}
Output:
Conclusão
Este tutorial mostrou como criar e animar gradientes em QML, utilizando um botão como exemplo. As técnicas apresentadas podem ser adaptadas para enriquecer outros componentes de sua interface de usuário.
Espero que tenha sido útil para alguém e sintam-se livres para comentar ou perguntar algo nos comentários!
Grande abraço e tchauuu
What's Your Reaction?