FPV Drone Build Under 300$ With Goggles & Controller
Learn how to build a custom FPV drone for under $300, complete with goggles and a controller. Our guide provides step-by-step instructions and carefully curated component selections. Start your FPV journey today!
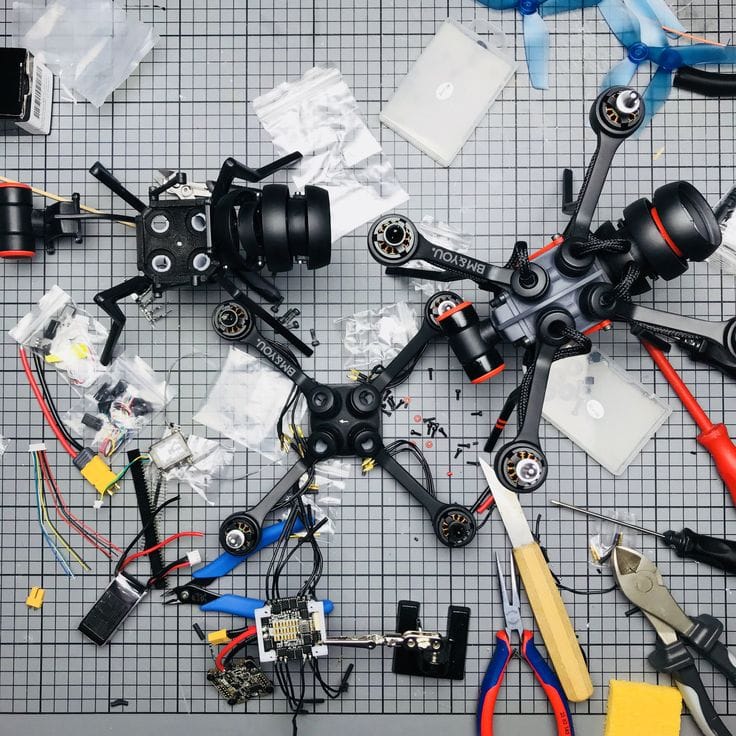

Welcome to our guide, where we'll take you through the process of building your very own custom FPV drone for just under $300. This build is ideal for beginners who are eager to embark on the journey of creating their own FPV drone. We've carefully curated this guide with affordability and quality in mind, ensuring that even with this budget, you'll receive a high-quality transmitter (controller) and goggles that will stand the test of time.
Hardware
Now let's get started with the hardware you need:
- FC & ESC Stack: SpeedyBee F405 Mini BLS 35A 20x20 Stack - AliExpress Price 48.21USD
- Motor: LANNRC 1505 4PCS 3750KV - AliExpress Price: 25.20USD
- VTX: RUSH TINY TANK Nano VTX 48CH 350mW Transmitter 5V Input w/ LED Expansion Board - AliExpress Price: 22.54USD
- Propellers: Emax Avan Propellers - AliExpress Pirce: 2.49USD
- Caerma: 1/3 CMOS 1500TVL Mini FPV Camera 2.1mm Lens - AliExpress Price: 8.75USD
- Receiver: SpeedyBee Nano 2.4G ExpressLRS ELRS Receiver - AliExpress Price: 7.19USD
- Frame: HappyModel Crux35 3.5inch Frame - AliExpress Price: 15.29USD
- Charger: ToolkitRC M4 Pocket - AliExpress Price: 19.93USD
- Controller: Radiomaster Pocket ±250mW (Recommended By Reddit Users) - AliExpress Price: 63.89USD | Jumper T Lite ±100mW (Recommended For Compact Build) - AliExpress Price: 59.99USD
Your Radio Transmitter (Controller) usually has a better range than your VTX, so don't worry too much about the transmission power and range. If you're pushing the limits, you'll likely lose video before losing control
- Goggles: BETAFPV VR03 FPV - AliExpress Price: 62.29USD
- 1x Soldering Iron + 60/40 Solder Wire (Optional - You can go to a nearby electronic shop to solder)
Total: 295.59 USD Including Shipping + Tax
Frame
For the frame, we chose the 3.5-inch model from Happymodel, specifically the Crux35, to maintain affordability. We aimed to stay within the 3.5-inch size as it helps keep costs down. The Happymodel Crux35 is recognized as one of the best value-for-money models on the market, so we decided to go with this well-tested frame. Additionally, it is the most cost-effective quality frame we could find. It's important to note that this frame accommodates both 20x20 mm and 25.5x25.5 mm mounting holes for your stack, providing flexibility in choosing the appropriate flight controller and ESCs to match.
FC & ESC
We opted for the Speedy Bee F405 Mini. Although a cheaper board could have saved us a few dollars, the seller is offering a discount until April 20th, reducing the price to $48.21 USD. This is a fantastic deal for a Speedy Bee flight controller and ESC combo. It's important to note that Speedy Bee includes several exceptional features not found in other stacks, most notably Bluetooth connectivity. This feature greatly simplifies the process of configuring your drone on the go.
If you decide to choose a different board, just make sure that the amperage is sufficient for your build and that the mounting holes align with your frame.
Motors
As outlined in our beginner's guide, motor choices for our project range from 1404 to 1806 sizes. Smaller motors are more efficient but offer less power, while larger motors provide more thrust at the cost of higher battery consumption. We decided that 1505 motors strike the best balance for our needs, especially since we plan to use batteries ranging from 3S to 4S, and 3750kv seemed to be the optimal choice for these specifications.
Given that we opted for slightly larger motors than what the Happymodel Crux35 frame typically supports, we needed to find the most affordable options available. However, we haven’t yet tested how these motors perform or assessed their quality in-depth, so your experience might vary. It's important to note that opting for cheaper motors often means less choice in terms of aesthetics, such as color options.
Propellers
To maintain our budget, we opted for the most affordable 3.5-inch propellers from EMAX, a very reputable company known for its quality drone components. This choice ensures we're not compromising on reliability while still keeping costs as low as possible.
Camera
For the camera, we decided to consolidate our purchases to save on shipping by selecting from what was available from the same seller who provided the frame, propellers, and receiver. While the RunCam Nano 2 was an option, we chose to save a few extra dollars by opting for a generic brand. This is a risk we are willing to take to keep costs down. However, if you prefer a tried-and-tested option, the same seller also offers the RunCam Nano 2, which is well-regarded for its performance and reliability.
Receiver
The seller who supplied the frame, propellers, and receiver also offered the SpeedyBee Nano 2.4G ExpressLRS ELRS receiver at a very attractive price, making it an easy choice for us. The ExpressLRS system is known for its high performance and long-range capabilities, which align well with our project goals while keeping the budget under control. Opting for this receiver was a no-brainer, considering its excellent value and compatibility with our setup.
VTX
When selecting the VTX (Video Transmitter) for our setup, we initially considered the Happymodel OVX306, which is used in the Happymodel Crux35. However, this option proved to be a bit expensive and would have pushed us over our budget. Consequently, we opted for the RUSH TINY TANK Nano VTX instead.
While the RUSH TINY TANK Nano is significantly smaller and thus more challenging to work with, we chose the version that includes an expansion board to ease installation and handling. It supports up to 350mW at 5.8GHz, which is slightly less than the 400mW offered by the OVX306, but still quite adequate for our needs. Additionally, with features like pit mode, it presents a really good deal and helps us stay within our financial limits without compromising much on functionality.
Battery & Charger
For the battery, we've opted for a 4S 650mAh or 850mAh variant, depending on local regulations regarding weight restrictions. It's important to note that a lower mAh rating will result in shorter flight times. While we haven't provided a specific link for purchasing batteries due to international shipping challenges, we recommend sourcing them from local stores. Keep in mind that the FC & ESC stack comes with a battery cable compatible with XT-30 connectors.
Regarding the charger, we've chosen the ToolkitRC M4 Pocket 80W. Despite its lower wattage, which translates to slower charging speeds and limited functionality compared to larger models, it meets our needs perfectly. The M4 Pocket features XT-60 and XT-30 outputs, as well as a balancer, all packaged in a small and portable design. Notably, it can be powered via USB-C, eliminating the need for a separate power brick or PSU. While it's limited to charging batteries up to 4S, opting for the M7 model would future-proof your charging capabilities. However, to maintain affordability and portability, the M4 is an excellent choice, sparing you the hassle of dealing with additional cables and converters commonly required with other chargers, especially for beginners.
Transmitter (Controller)
Selecting the right controller was a challenging decision. We had to weigh the options between choosing a less expensive controller that might not endure long-term use and a pricier one that could be out of reach for some budgets. Fortunately, by keeping the overall cost of the drone low, we were able to opt for a high-quality brand without significantly increasing the project budget.
We chose the Radiomaster Pocket or Jumper T-Lite, which, although the Jumoer T-Lite is not a full-sized controller unlike Radiomaster Pocket, offers excellent quality, durability, and range as well. Opting for a reputable brand like Radiomaster or Jumper ensures that the controller will last, providing better value over time. This decision is particularly crucial because even the less expensive controllers are priced relatively close to higher-quality options. Purchasing a cheaper controller might save money upfront, but if it breaks, the cost of replacement could make it more expensive in the long run.
Moreover, investing in a higher-quality controller like the Radiomaster or Jumper T-Lite minimizes the risk of malfunction, unlike the drone, which is more likely to suffer damage during use. Additionally, if the need arises, a well-maintained, quality controller has a better resale value, offering an avenue to recoup some of the investment if you decide to upgrade or no longer need it. This approach helps ensure that spending a bit more upfront can actually be more cost-effective and safer in the long term.
In selecting the controller, we opted exclusively for an ExpressLRS (ELRS) compatible controller since we already chose an ELRS receiver for the drone. This decision was strategic, allowing for seamless integration and compatibility between the controller and receiver. Additionally, opting for an ELRS-specific controller proved to be more cost-effective compared to a 4-in-1 multi-protocol controller. By focusing on ELRS only, we were able to further keep the costs down without compromising on the quality and reliability offered by the Radiomaster or Jumper T-Lite, which supports this protocol. This approach not only streamlines the setup but also enhances overall performance, ensuring a better flying experience.
When comparing the Radiomaster and Jumper controllers, each offers unique advantages catering to different preferences and needs. The Radiomaster boasts a robust 250mW transmission power and a full-sized controller design, providing a solid grip and intuitive button layout. This makes it ideal for those prioritizing maximum transmission range and comfortable handling during long sessions.
On the other hand, the Jumper controller may have a slightly lower 100mW transmission power, but its compact size makes it perfect for travel and on-the-go use. Its flip switches offer a convenient alternative to the button interface found on the Radiomaster, giving users quick access to key functions with a simple flick. This makes the Jumper a versatile option for pilots who value portability and streamlined operation without compromising on quality and performance.
Ultimately, the choice between the Radiomaster and Jumper controllers comes down to individual preferences, with the Radiomaster excelling in power and ergonomics, while the Jumper offers a compact, travel-friendly design with convenient flip switches.
Goggles
When it came to choosing goggles, we encountered a familiar dilemma. While the cheapest options lacked DVR recording capabilities, compromising our ability to review flights or locate our drone after a crash, others offered poor quality and integrated antennas with no option for upgrades. Many suggested Eachine EV800 goggles, but we found neither their design nor their price and availability satisfactory.
Ultimately, we settled on the BetaFPV VR03 goggles. While they may not be the most recommended option, BetaFPV is a reputable company, and these goggles have been relatively well-tested by a good number of people. They offer DVR recording functionality and feature one external antenna that can be swapped out for improved signal strength. The design is sleek and appealing, and while they may not be top-of-the-line goggles, they are more than capable of getting the job done and should last for a considerable time.
In conclusion, our guide has provided you with a comprehensive blueprint for building your very own custom FPV drone for just under $300. This build is tailored for beginners who are eager to dive into the exciting world of FPV flying while maintaining affordability and quality.
We've meticulously selected each component with careful consideration, ensuring that you receive high-quality hardware that will stand the test of time. From the SpeedyBee F405 Mini FC & ESC stack to the BetaFPV VR03 goggles, every choice has been made to maximize performance and value within your budget.
In the next blog post, we'll dive into the wiring and assembly process, providing you with a step-by-step tutorial to guide you through the setup of your custom FPV drone. Stay tuned for detailed instructions on how to connect and configure each component for the perfect flying experience.
With this guide and a bit of patience, you'll soon be soaring through the skies with your very own FPV creation. Happy flying!
What's Your Reaction?


